Wireless Backup Camera Signal Problems
Wireless backup camera signal problems are common, and most have simple causes. A wireless backup camera sends video from the back of a vehicle to a dashboard screen by radio. When the signal weakens or is disrupted, the picture can freeze, break up or disappear.
This article explains what a wireless backup camera does and why its signal matters. It covers common problems, their usual causes and step-by-step troubleshooting. It also compares digital and analog systems.
Key Takeaways
- A wireless backup camera sends video by radio, so signal strength directly affects picture quality.
- Distance, walls, metal parts and radio interference are the most common causes of weak signal.
- Many problems can be checked at home with power checks, antenna position and a short distance test.
- Keeping the lens clean and the mounting position sensible can prevent many issues.
- If basic steps do not help, a professional installer can check the wiring and equipment.
What Is a Wireless Backup Camera and Why Does Its Signal Matter?
A wireless backup camera is a small camera mounted at the rear of a vehicle. It shows the area behind the car on a monitor, often near the rear view mirror or in the dashboard. Radio waves carry the video, so no cable runs the length of the vehicle.
The video depends on the signal. A strong signal delivers a smooth, sharp image, while a weak one can cause delay, noise or a blank screen. That makes it harder to judge distance behind the vehicle.
How a Wireless Backup Camera Sends Video to the Screen
The camera captures video and converts it into a radio signal. A transmitter sends that signal through an antenna, and a receiver near the monitor picks it up. Both devices must stay within range and away from heavy interference.
Power usually comes from the reverse light circuit or a dedicated source, and this connection also affects performance.
Why a Strong Signal Keeps the Picture Clear
Radio signals lose strength as they travel and pass through obstacles. A weak signal often appears as snow, flicker or frozen frames. Small changes in placement or antenna position can make a noticeable difference.
Common Wireless Backup Camera Signal Problems
Signal problems tend to show up in a few recognizable ways. Knowing the symptoms helps a beginner narrow down the cause, since each one points to a different part of the system.
Video Lag, Freezing and Choppy Images
Lag means the picture arrives a little late, so objects appear behind the vehicle after they have already moved. Freezing means the image stops and then jumps forward. Choppy video looks broken or stuttery.
These symptoms often happen when the signal is weak but still present. Moving the antenna or shortening the distance to the camera often helps.
Static, Snow and Dropped Video
Static or snow looks like speckled noise over the picture. Dropped video means the image cuts out briefly and then returns. Both usually point to interference or a signal near its limit.
Snow can also appear when the camera lens is partly covered or the power supply is unstable. Checking these basics first can save time.
No Signal Message or Blank Screen
A “no signal” message means the monitor is not receiving anything it can use. A blank screen often means the camera has no power, the transmitter is off, or the signal is fully blocked. Confirm that both the camera and monitor have power first.
A loose connection, dust, moisture or a worn plug can also break the link. Checking each connection by hand often reveals the problem.
Interference From Other Wireless Devices
Wireless backup cameras share radio space with many everyday devices. Some systems operate on frequencies that overlap with Wi-Fi routers, cordless phones and other radio equipment, which can add noise.
Interference often shows up as flickering or intermittent static. Turning off nearby sources is a simple way to test if interference is the cause.
What Causes Weak Signal in a Wireless Backup Camera?
Weak signal usually comes from a few common causes. Camera placement is easy to change, but the vehicle’s structure is harder to alter. Knowing the cause helps you choose which fix to try first.
Distance Between the Camera and the Receiver
Every wireless system has a practical range. The farther the camera is from the monitor, the harder it is for the signal to arrive cleanly. Long trailers or large trucks may push the system to its limit.
Manufacturer range ratings are often measured under ideal conditions. Keep the camera and receiver as close together as the installation allows.
Walls, Metal Bumpers and Trailer Frames
Radio waves weaken when they pass through solid materials, and metal blocks them especially well. A bumper, truck bed, trailer frame or metal cargo area can all reduce signal strength.
Mounting the camera with a clear line of sight to the receiver can make a real difference. Plastic covers usually interfere less than thick metal parts.
Radio Interference From Phones, Routers and Nearby Vehicles
Phones, routers, Bluetooth devices and other vehicles can all create radio noise. In a crowded parking lot, the signal may briefly struggle. This interference often comes and goes with the surroundings.
Some signal problems have nothing to do with the camera system itself. Testing in a quieter location can confirm if nearby sources are the cause.
Dirty Lenses and Damaged Antennas
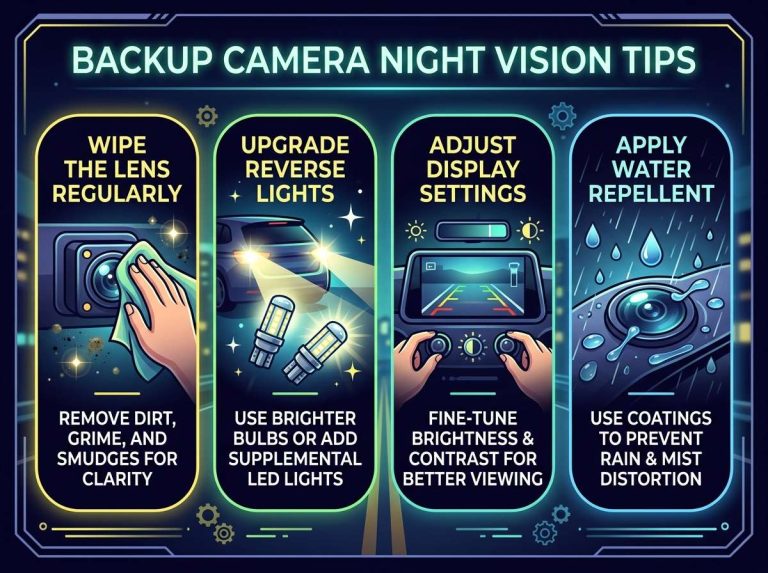
A dirty lens can make the picture look hazy or dark, even when the signal is strong. Mud, water spots and road grime are common culprits. Wiping the lens gently with a soft cloth usually solves this.
A damaged antenna can also weaken the signal. Cracks, bent wires or loose connectors reduce how well it sends and receives radio waves. Replacing a damaged antenna is often inexpensive and simple.
How to Troubleshoot a Wireless Backup Camera Signal Problem
Troubleshooting works best when done in order. Start with the simplest checks and move to detailed ones only if needed. Most beginners can complete the first steps without special tools.
Step 1: Check the Power Connections
Confirm that the camera and monitor both receive power. Make sure the reverse light circuit or power source works. Look for loose plugs, corroded contacts or pulled wires.
A weak or unstable power supply can cause snow, flickering and dropped video. Securing each connection often fixes these symptoms right away.
Step 2: Move the Antenna and Reposition the Camera
Small changes in antenna direction can improve reception. Rotate or tilt the antenna while watching the screen, and note which position gives the cleanest picture.
If metal blocks the camera, try a spot with a clearer line of sight to the receiver. Keep the lens free of obstructions and confirm the view still covers the area behind the vehicle.
Step 3: Test Signal at Different Distances
Compare picture quality with the camera close to the receiver and farther away. If the signal is clean up close but breaks up at longer range, the system may be operating near its limit, so installation position matters.
Testing in a quiet location also helps. If the picture improves away from busy areas, nearby devices may be causing interference.
Step 4: Remove or Turn Off Nearby Interference Sources
Turn off phones, routers and other wireless devices near the vehicle or monitor for a short test. If the picture clears, you have found the interference source, and you can move the monitor or device to a different spot.
Some sources, such as a neighbor’s wireless equipment, cannot be controlled. In those cases, repositioning the antenna or camera is usually the more practical fix.
When to Call a Professional Installer
If the basic steps do not solve the problem, a professional installer can inspect the wiring, check the power supply and test equipment with tools a beginner may lack. This is especially useful if the system was installed incorrectly.
A professional can also advise if the system is simply too limited for the vehicle. Sometimes the best solution is a different unit rather than repeated adjustments.
Tips to Prevent Wireless Backup Camera Signal Issues
Prevention is easier than repair. A few habits and good installation choices keep the signal stable over time. These tips apply to most wireless systems.
Picking the Right Mounting Position for the Camera
Mount the camera with a clear view behind the vehicle and a short, unobstructed path to the receiver. Avoid spots surrounded by thick metal. Follow the manufacturer’s guidance on height and angle.
Keeping the Lens Clean and the Connections Secure
Wipe the lens regularly, especially after rain, mud or road salt. Check that plugs and wires stay firmly connected. Secure loose cables so vibration cannot pull them free.
Checking Battery Levels on Battery-Powered Systems
Some wireless cameras run on batteries. Low power can weaken transmission and cause flickering. Replace batteries when the manufacturer recommends it.
Wireless Backup Camera Signal Problems Compared: Digital Versus Analog Systems
Wireless backup cameras generally use either digital or analog transmission. Each handles interference and distance differently. Knowing the difference helps set realistic expectations.
How Digital Systems Handle Interference
Digital systems convert video into coded data. The receiver can often correct small errors when the signal is disturbed. The picture stays clean until the signal drops below a certain point, then it may freeze or go blank.
How Analog Systems Handle Interference
Analog systems send video as a continuous wave. Interference usually appears gradually as snow, lines or ghosting. The picture degrades step by step as the signal weakens.
Which System Suits a Beginner Better
Digital systems often feel simpler because the picture stays stable until the signal is truly weak. Analog systems can be easier to diagnose because symptoms appear gradually. Either works well when installed correctly, so the right choice depends on the vehicle and budget.
Real-World Example: Diagnosing a Blank Screen on a Pickup Truck
Consider a pickup owner who finds the backup screen blank whenever the vehicle goes into reverse. The owner confirms the monitor powers on normally. Next, the owner inspects the camera power connection beneath the tailgate.
The connection is slightly loose and has collected road dust. After cleaning the contacts and securing the plug, the picture returns. The blank screen does not come back during later tests. A simple connection check solved a problem that looked more serious.
Frequently Asked Questions
Why does my wireless backup camera lag only when I reverse?
The system often switches on when reverse gear is engaged, so lag may appear at that moment. A weak signal or low power can cause delay in the first seconds. Checking power and antenna position usually helps.
Can my Wi-Fi router cause backup camera signal problems?
A nearby router can add radio noise, especially if both use similar frequencies. Moving the monitor or router, or testing with the router off, can confirm the cause.
How far can a wireless backup camera transmit its signal?
Range depends on the model, the antenna and the surroundings. Manufacturers often state a range under ideal conditions, and real vehicles usually get less. The product documentation gives the most accurate answer.
Does weather affect wireless backup camera signal strength?
Heavy rain, fog or snow can affect radio signals, though the effect is usually small compared with metal and distance. Moisture on the lens can also blur the picture. Keeping the lens clean helps in wet conditions.
Can I fix a wireless backup camera signal problem myself?
Many common problems can be fixed at home. Checking power, cleaning the lens, moving the antenna and testing for interference are beginner-friendly steps. If the problem continues, a professional installer can help.
Conclusion
Wireless backup camera signal problems usually come from a few simple causes. Distance, metal barriers, radio interference, dirty lenses and loose connections are the most common. Working through the checks in order often reveals the source.
Good mounting, clean connections and routine care prevent many issues. When basic steps do not help, a professional installer can take a closer look. With a little patience, most beginners can keep their rear view video clear and steady.

Peterson is an automotive safety enthusiast and product reviewer with a passion for helping drivers stay safe on the road. He researches and tests dash cams, backup cameras, TPMS systems, emergency tools, GPS trackers, and other vehicle safety products to provide honest, practical recommendations. Through CarSafeties.com, Peterson shares in-depth reviews, buying guides, and maintenance tips to help drivers make smarter and safer decisions.